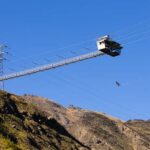
REVIEW · QUEENSTOWN
Mount Cook Tour: Finish at Queenstown, Christchurch or Dunedin
Book on Viator →Operated by Waimate Journeys · Bookable on Viator
Aoraki Mount Cook is worth the long drive. This private day trip strings together Lake Tekapo, Lake Pukaki, and the Mount Cook area with time for big walks and glacier-view options, plus a guide-driver who handles the timing and the route.
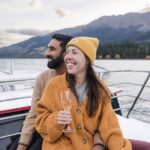
I really like two things here. First, the small-group setup with a dedicated guide-driver means you’re not squeezed into a crowd, and you get quick answers on what you’re seeing (for one group, the guide was named Rango). Second, the day hits the signature scenery—especially the turquoise look of Lake Pukaki—without wasting your time on complicated transfers.
One consideration: the schedule is busy and weather-dependent. You’re leaving early and using a lot of road time, and the main walking choices at Mount Cook (like the Hooker Valley Track) may not feel great if you prefer short, easy strolls only.
In This Review
- Key things to know before you go
- Aoraki Mount Cook day trip: the route that gives you real variety
- Pick-up roads: what changes depending on where you start
- Lake Tekapo for Christchurch pick-ups: Good Shepherd views and a light start
- Lake Pukaki stops: turquoise views plus time to breathe
- Mount Cook time: Hooker Valley swing bridges, Hooker Lake, and glacier views
- The Hooker Valley Track option
- Tasman Glacier View Walks option
- Mount Cook Visitor Centre
- Alpine kea spotting
- Private guide-driver energy: Rango’s kind, careful way of running the day
- Timing and comfort: how the 8.5 road hours fit into a 12–12.5 hour day
- What you actually pay for: value at $1,550.81 per group
- Who this Mount Cook tour suits best
- Quick tips before you go
- FAQ
- What time does the tour start?
- How long does the Mount Cook tour take?
- Where can the pickup happen?
- Where can the tour end?
- Is this a private tour?
- What’s included in the price?
- Are food and drinks included?
- What can I do at Mount Cook?
- Are there admission fees for the main stops?
- What happens if the weather is poor?
- Should you book this Mount Cook tour?
Key things to know before you go
- Dedicated private transport with a guide-driver just for your group (not a mixed bus tour)
- Morning pick-up from Queenstown, Christchurch, or Dunedin, then a scenic run toward Aoraki Mount Cook
- Lake Tekapo and Lake Pukaki stops with free viewing time and photo pull-offs
- Mount Cook time includes choices like the Hooker Valley Track swing bridges and Hooker Lake, plus Tasman Glacier View Walks options
- On-board comfort is practical: WiFi, charging cables, bottled water, and snacks/chocolates
- Good-weather day: the experience needs decent conditions, or it may be rescheduled or refunded
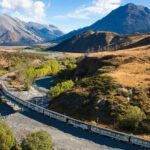
Aoraki Mount Cook day trip: the route that gives you real variety
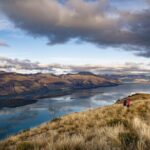
This is the kind of day that balances wide-open views with actual walking time. You start with lake scenery, then you work your way into the Mount Cook area where the scenery gets more dramatic and the trail options feel worth the effort.
The key value for you is pacing. You get multiple “wow” stops—Lake Tekapo (on Christchurch pick-ups), Lake Pukaki, and then Mount Cook—so the day doesn’t hinge on one single viewpoint. Even if clouds roll in for part of the day, you still have several chances to see the area at its best.
Other Queenstown tours we've reviewed in Queenstown
Pick-up roads: what changes depending on where you start
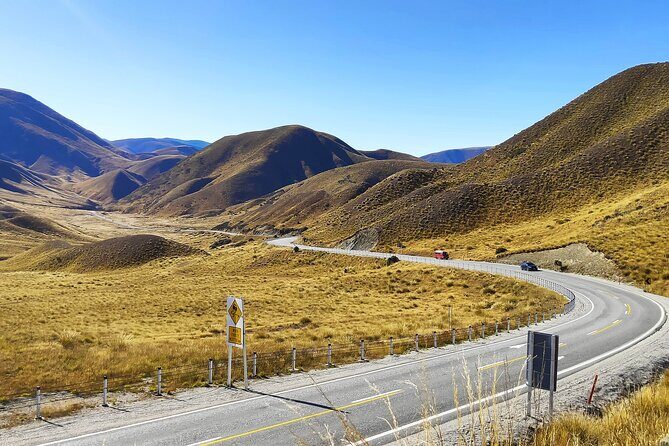
One smart thing about this tour is that your pickup city shapes the drive. You’re not just doing the same highway both ways.
Queenstown pick-up starts with familiar Central Otago highlights. You’ll pass Kawarau Suspension Bridge, the Roaring Meg area, and Cromwell, then stop around Lindis Pass and at High Country Salmon before heading toward the Mount Cook region. If you’re already in Queenstown, this route feels like it pulls you out of town fast and keeps the scenery moving.
Christchurch pick-up goes through Geraldine and Fairlie, with a stop at Fairlie Bakehouse, then a visit to Lake Tekapo. This version is nice if you want your first big photo moment early, before the day gets fully focused on Mount Cook.
Dunedin pick-up takes a different style of drive, using the Waitaki River and Omarama, then stopping at Oamaru and High Country Salmon. It’s a good option if you want a longer, scenic read of the region without extra planning.
No matter which city you start in, the “finish” option also matters. The experience can end back in Queenstown, Christchurch, Dunedin, or you can end the day at Mount Cook itself. That flexibility can help you link this outing to your next overnight plan without forcing an extra day of travel.
Lake Tekapo for Christchurch pick-ups: Good Shepherd views and a light start
If you’re picked up in Christchurch, your day begins with a stop at Lake Tekapo. There’s also time at the Church of the Good Shepherd, framed by the lake and the Southern Alps backdrop.
What I like about this stop for your day is that it’s not just “drive-by photos.” You get a brief, easy walk time to stretch your legs, take in the view, and get your bearings before the deeper mountain portion of the day.
A drawback to consider: it’s a short stop. If you want lots of time to explore around the lake shore or do a longer hike, this won’t be that day. But for most people, it’s the perfect warm-up.
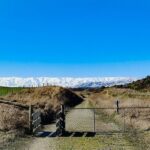
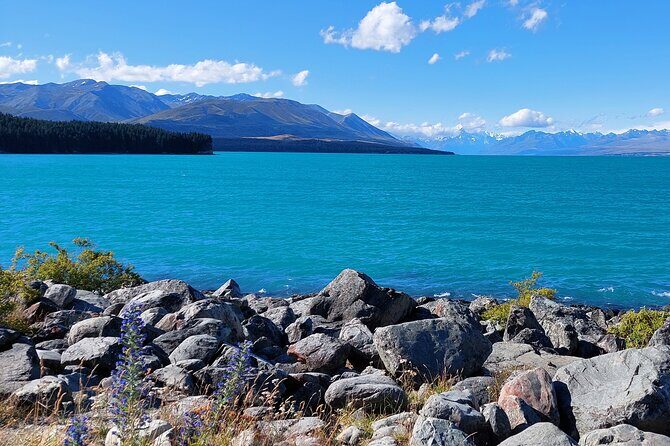
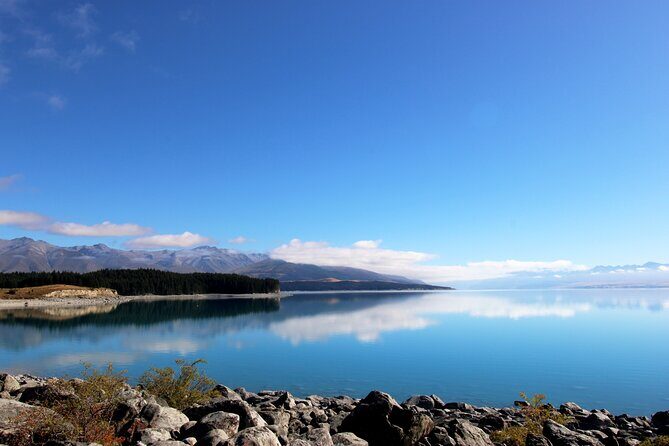
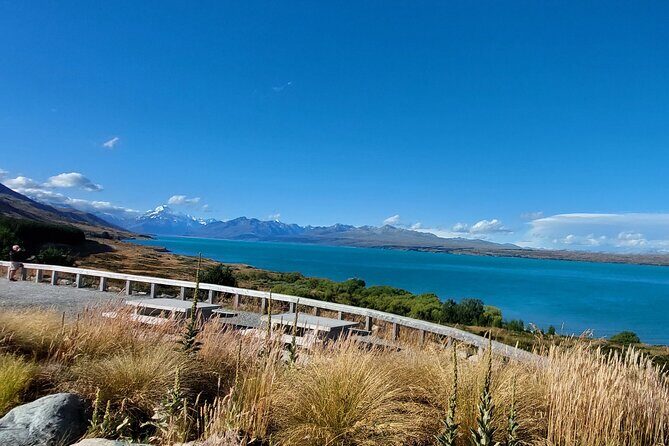
Lake Pukaki stops: turquoise views plus time to breathe
Next comes Lake Pukaki. You’ll have panoramic lookout stops and time to appreciate the glacier-fed color—those turquoise tones that make the area famous.
This is where the tour starts feeling like a “one-day greatest hits” trip, in a good way. The lake views are quick to enjoy, and the stops make it easy to hop out, get a few solid photos, and then get back on schedule.
What to watch for: the weather can change how the light looks. If skies are clear, you’ll likely get crisp color and strong reflections. If it’s cloudy, the lake can still look gorgeous, but the photos may feel more muted—still worth stepping out for, just don’t expect every minute to be postcard-perfect.
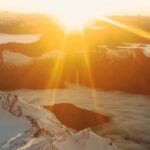
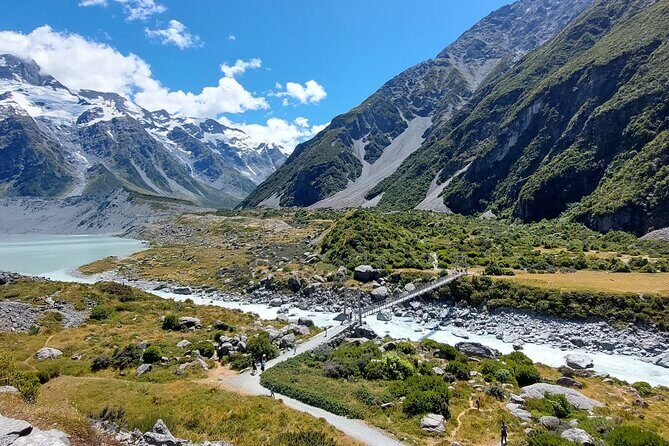
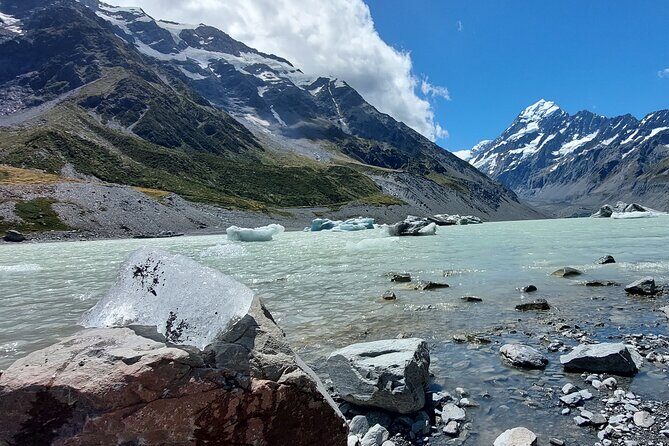
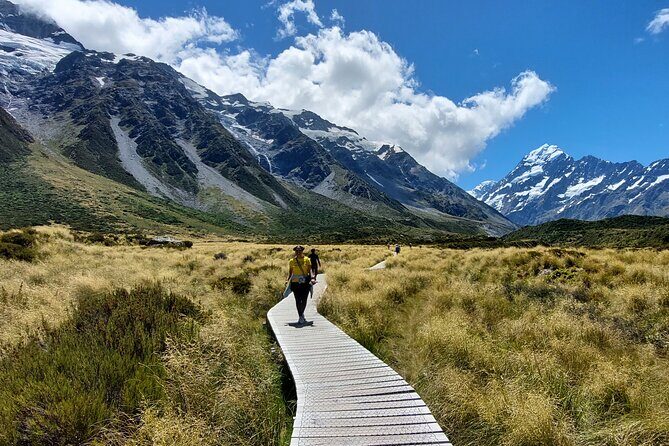
Mount Cook time: Hooker Valley swing bridges, Hooker Lake, and glacier views
Now the main event. Once you reach Aoraki/Mt. Cook, you get time to choose your walking style.

The Hooker Valley Track option
A big highlight is the Hooker Valley Track, including the famous swing bridges and time around Hooker Lake. This portion is listed as about 3 hours, and it’s the kind of trail where you earn the views with your legs.
For you, the win here is variety: you’ll be walking through valley scenery, crossing the bridges, and then shifting your focus toward the lake. It’s not just one viewpoint repeated.
The caution is simple: it’s a real walk. Wear proper footwear and plan for changes in mountain weather, even if the morning starts mild. The operator provides emergency rain gear, which helps, but it doesn’t replace good layers and shoes.
Tasman Glacier View Walks option
You can also choose Tasman Glacier View Walks. The exact route details aren’t spelled out in what you’re given, but the idea is clear: shorter walking options focused on glacier views.
If you’re not up for the longer feel of the Hooker Valley Track, this can be a smarter choice without turning the day into a purely scenic drive. You’ll still get the Mount Cook area feeling, just in a different way.
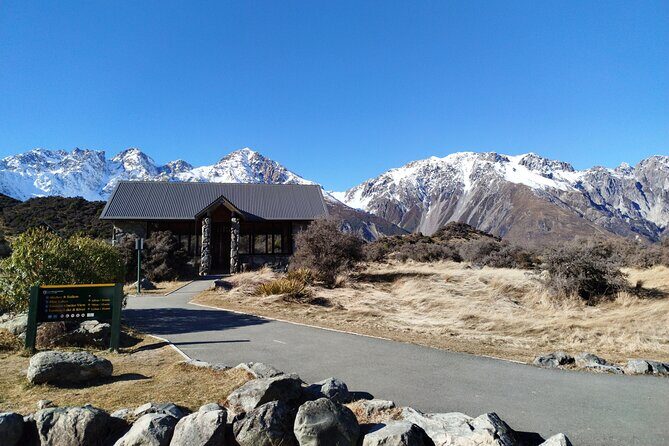
Mount Cook Visitor Centre
There’s also time at the Mount Cook Visitor Centre. This is valuable when you want more context fast—what you’re looking at, how the region formed, and what people have done there historically (at least at the level the centre covers).
If you’re the type who likes to understand what you’re seeing before taking photos, this stop can turn a pretty view into a more meaningful one.
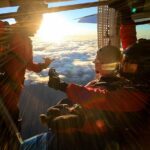
Alpine kea spotting
The tour also includes a chance to spot alpine kea. This is one of those wildlife moments that can’t be guaranteed, but it’s a great bonus when it happens. If you want the best odds, slow down when you’re outside and keep your eyes up—keas are curious and they tend to show themselves when people aren’t rushing.
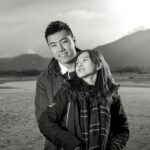
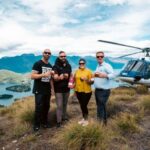
Private guide-driver energy: Rango’s kind, careful way of running the day
The private format isn’t just a “small group” label. It changes how the day feels. You’re with a guide-driver exclusively for your group, and that means the schedule feels smoother and less stressful.
One review named the guide Rango, and the feedback was very consistent about the same theme: the day felt organized, the car was tidy and comfortable, and the guide took care of the details so you could focus on the scenery. That kind of guiding matters on a Mount Cook day because small timing shifts (like choosing the right moment for photos or a walk start) can make the difference between a calm trip and a rushed one.
Also, the on-board touches help. You get WiFi on board, charging cables, and packaged water bottles plus snacks & chocolates. Food isn’t included, but those snacks can keep your energy steady before and during the longer walking portion.
Timing and comfort: how the 8.5 road hours fit into a 12–12.5 hour day
Your day starts at 7:00 am, and the total experience runs about 12 hours to 12 hours 30 minutes. Total road time is approximately 8.5 hours, which tells you the day is not laid-back. You’ll spend a lot of time in the vehicle—by design—so you can reach multiple highlight zones.
Here’s how I’d think about it for your comfort:
- The driving portion is what makes the itinerary possible. Use it well: hydrate early, eat the snacks before your walk time, and take advantage of charging cables.
- The walking portion is the payoff. For the Hooker Valley Track, you’ll likely feel it after the morning drive, so plan a slower pace at the start rather than trying to power through.
- The operator provides emergency rain gear, but mountain weather can still be tricky. Dress in layers you can adjust quickly.
One more practical note: this ends in a different location. That’s great for travel planning, but you’ll want to line up your next day with enough buffer so you’re not sprinting right after you get dropped off.
What you actually pay for: value at $1,550.81 per group
The price is listed as $1,550.81 per group (up to 3). That’s not cheap on the surface, but private Mount Cook transport is expensive everywhere—because it’s long-distance driving and the day has to be timed around weather and daylight.
Here’s the value angle for you:
- You’re buying private transportation and a dedicated guide-driver, which reduces wasted time and makes the day more flexible for small-group needs.
- You get practical inclusions: WiFi, charging, bottled water, and snacks & chocolates.
- The big scenic stops are included, and key admission items listed for stops like Lake Tekapo, Lake Pukaki, and Mount Cook are marked as free in the experience details.
So the real question becomes: is this cheaper than renting a car and driving yourself? Often it might be similar—or more—depending on where you start and how you manage fuel, parking, and weather slowdowns. The advantage of paying is that you remove the driving stress and get a human guide to help shape the day.
If you’re traveling as a couple or small family, this can feel like good value because the “per person” cost drops fast when shared among a small group.
Who this Mount Cook tour suits best
This works especially well if you:
- Want the classic Mount Cook region highlights without planning the route day-by-day
- Prefer private, small-group experiences over big coach tours
- Like a mix of scenic stops and at least one serious walking option
- Have limited time in New Zealand and want a single day that hits multiple iconic spots
It may be less ideal if you:
- Hate early starts and long vehicle time (7:00 am is early)
- Only want short, flat walks and little time outdoors
- Are traveling during a period when weather is historically unsettled and you don’t like the idea of being weather-dependent
Quick tips before you go
- Bring layers for Mount Cook. Even on a clear morning, conditions can shift.
- Wear shoes you trust for trail walking on the Hooker Valley Track option.
- If you’re the type who cares about photos, plan for quick pull-offs at Lake Pukaki and the busier view areas near Mount Cook.
- Since food & drinks are not included, plan how you’ll handle meals during your walking time and visitor centre stop.
FAQ
What time does the tour start?
The start time is 7:00 am.
How long does the Mount Cook tour take?
It runs about 12 hours to 12 hours 30 minutes.
Where can the pickup happen?
Pickup is offered from Queenstown, Christchurch, or Dunedin (from your hotel).
Where can the tour end?
The tour ends in a different location, either Queenstown, Christchurch, Dunedin, or at Mount Cook.
Is this a private tour?
Yes. It’s private, and only your group participates.
What’s included in the price?
You get private transportation, WiFi on board, packaged water bottles, packaged snacks & chocolates, charging cables and emergency rain gear, and a guide-driver exclusively for your group.
Are food and drinks included?
No. Food & drinks are not included.
What can I do at Mount Cook?
You can walk the Hooker Valley Track (including swing bridges and Hooker Lake), spot alpine kea, and/or do Tasman Glacier View Walks. There’s also time at the Mount Cook Visitor Centre.
Are there admission fees for the main stops?
The key stops listed (Lake Tekapo, Lake Pukaki, and the Mount Cook area time) show admission ticket free.
What happens if the weather is poor?
This experience requires good weather. If it’s canceled due to poor weather, you’ll be offered a different date or a full refund.
Should you book this Mount Cook tour?
I’d book it if you want a no-stress, private day that hits the big Aoraki Mount Cook sights plus Lake Tekapo and Lake Pukaki, with enough time at Mount Cook to do either the Hooker Valley Track swing-bridge walk or glacier-view walking options. The inclusions (snacks, water, charging, WiFi, and emergency rain gear) also make the day feel easier than going it alone.
If you don’t like early mornings, or you’re not confident with a few hours of walking, you might want to think twice and choose a lighter option instead. But for a small group aiming for maximum scenery in one day, this route is a strong pick.