REVIEW · WANAKA
Wanaka: 2-Hour Beginner Waterfall Cable Climb
Book on GetYourGuide →Operated by Wildwire Wanaka · Bookable on GetYourGuide
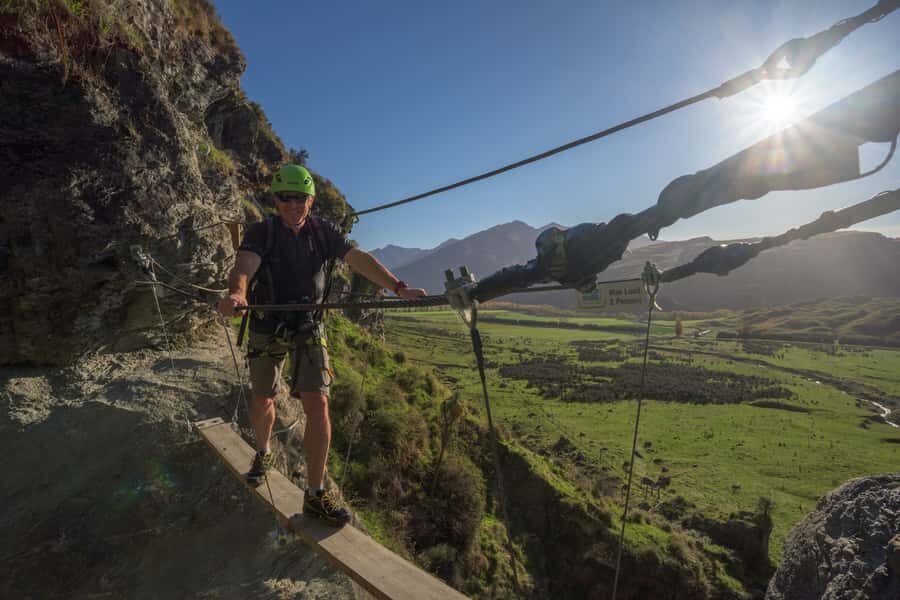
Cable climbing meets waterfall country. This Wanaka adventure takes you up Twin Falls on a via ferrata-style route on a working farm, using cables, iron rungs, ladders, and bridges to reach spots most people only see from below. I especially like how the guides keep it structured from the first steps—practice first, then the real climb in a small group led by people like Luke and Maddie or Rocky. I also love the mix of effort and payoff: rock scaling over pools, plus hidden waterfalls and big South Island views that feel earned, not handed to you.
One possible drawback: you’ll need to be comfortable with heights and full-body movement. If you’re the type to freeze up on suspension bridges, this might still be possible with calm coaching, but it won’t feel like a casual walk. Also, bring your own water bottle since water is provided but not the bottle.
In This Review
- Key highlights worth knowing
- Twin Falls Waterfall: the via ferrata idea in plain language
- The first 90 minutes: training that makes the climb make sense
- The beginner route: rungs, rock, suspension bridges, and waterfall secrets
- The snack-and-view moment at the top
- How hard is it, really? Fitness vs. fear
- Guides, group size, and why it feels safe
- What to pack for a smooth, grippy day
- Price and value: what NZ$118 buys you
- Who should book this Wanaka waterfall cable climb?
- Should you book the 2-Hour Beginner Waterfall Cable Climb?
- FAQ
- How long does the waterfall cable climb take?
- Where is the meeting point near Wanaka?
- Do I need any climbing experience?
- What should I wear and bring?
- Is it only for kids?
- What kind of difficulty should I expect?
Key highlights worth knowing
- Practice climb before the waterfall so you learn the system without rushing
- Small groups (up to 5 per guide) for real hands-on support
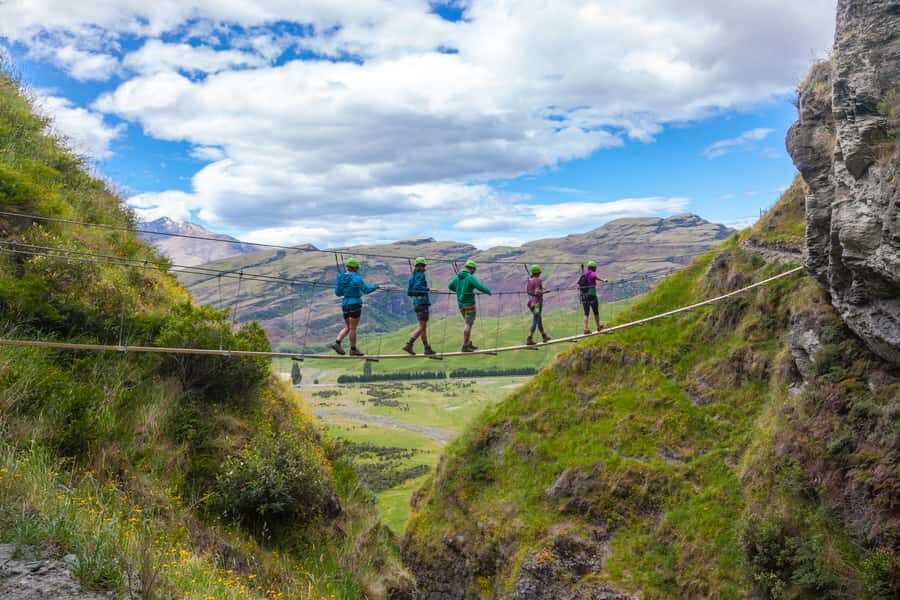
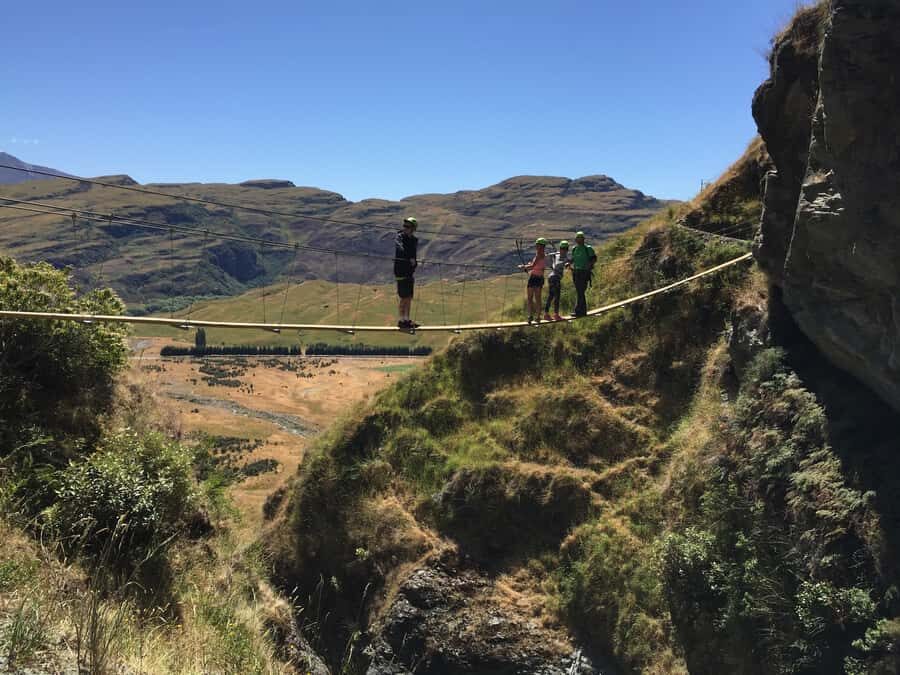
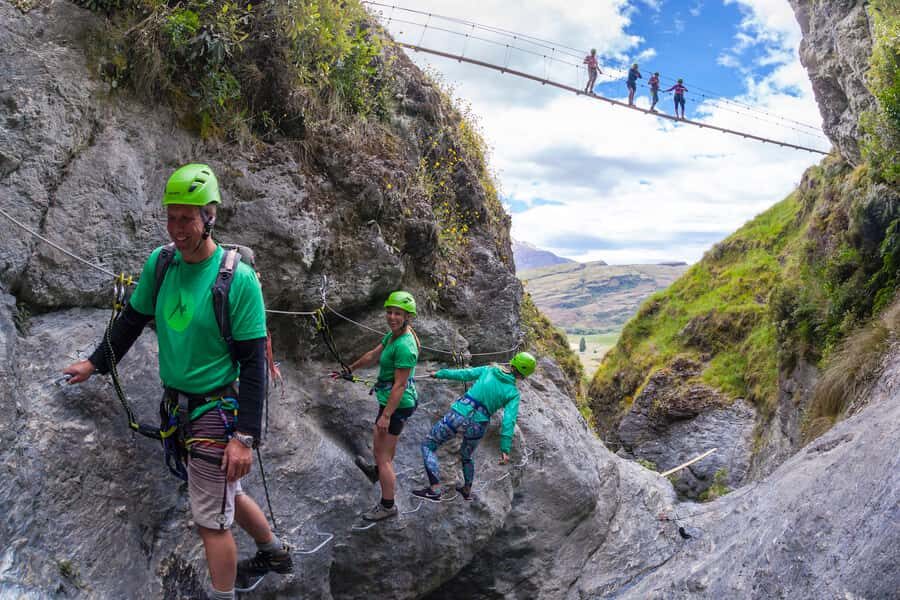
- Suspension bridges over pools that add thrills without turning it into a stunt show
- Hidden waterfalls and scenic rock sections on a beginner-friendly route
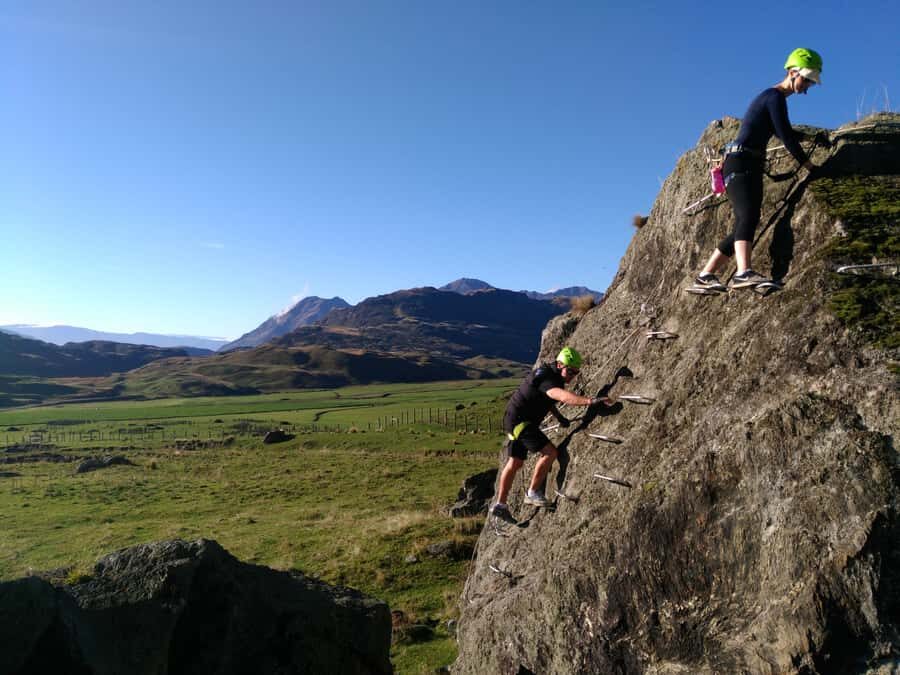
- Panoramic farm, mountain, and Lake Wanaka views during a snack-and-water break
- Optional upgrade to more challenging routes if you finish Level 1 feeling strong
Twin Falls Waterfall: the via ferrata idea in plain language

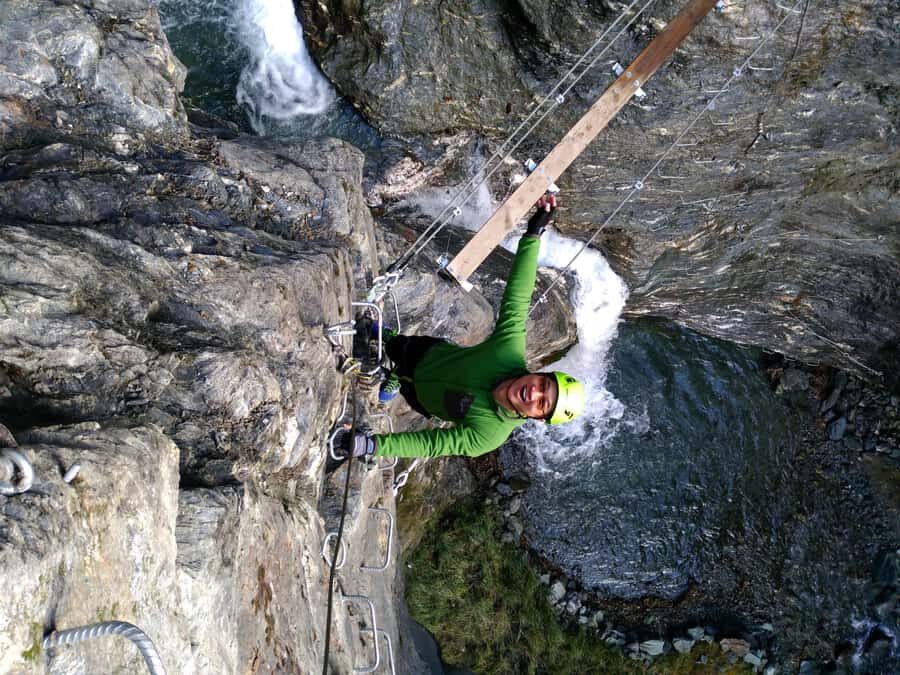
Wanaka is packed with natural drama, and this experience uses that drama in a smart way. You’re not just hiking up to a view. You’re climbing a working waterfall corridor using via ferrata gear—cables and fixed supports—so you can move along rock sections even when the terrain would be intimidating on your own.
The setting also matters. Twin Falls sits about 20 minutes from Wanaka, and the route runs through farmland country before it turns into that wet, rocky waterfall climbing zone. That mix of scenery—pasture outside, water and stone up close—keeps the adventure feeling fresh instead of repetitive.
If you like adrenaline but want it managed, this fits. Guides run safety briefings, fit harnesses and helmets, and teach you how to move through rungs and bridges. People do it with nervous energy, and that’s normal. What’s not normal is doing it alone. Here, you’re clipped in and guided start to finish.
Other Wanaka tours we've reviewed in Wanaka

The first 90 minutes: training that makes the climb make sense
Your day starts with a meet-up at the Wildfire property at Twin Falls, at a locked farm gate with the provider’s sign in front of the waterfalls. From there, it’s gear-up time: helmet, harness, and a safety briefing that’s meant for beginners.
Then comes the part that I think separates a good cable climb from a stressful one: the practice run. You’ll do a training climb on a safer section first, so you can learn how the equipment works before you’re committed to the real vertical bits.
That practice phase typically covers the basics you’ll need later:
- how to manage your clip points and movement along the line
- how to handle the fixed rungs and iron steps
- how to balance on rock while wearing a harness
- how to cross bridges with proper pacing and body control
After you get comfortable, you head up on a short walk to the cliffs. This is where the day flips from instruction mode to adventure mode.
Small groups help here. When you’re with no more than 5 participants per guide, you’re not lost in a crowd. You get quick corrections. You also get reassurance in the moment, which matters if your legs start second-guessing you halfway up.
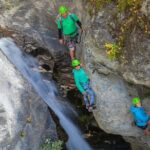
The beginner route: rungs, rock, suspension bridges, and waterfall secrets
On the beginner track, plan on about an hour of climbing. This is the core of the experience, and it’s built to feel challenging without being overwhelming.
The climbing style is classic via ferrata:
- fixed cables for attachment
- rungs and pegs for hand and foot placement
- ladders and bridges when the route needs a switch-up
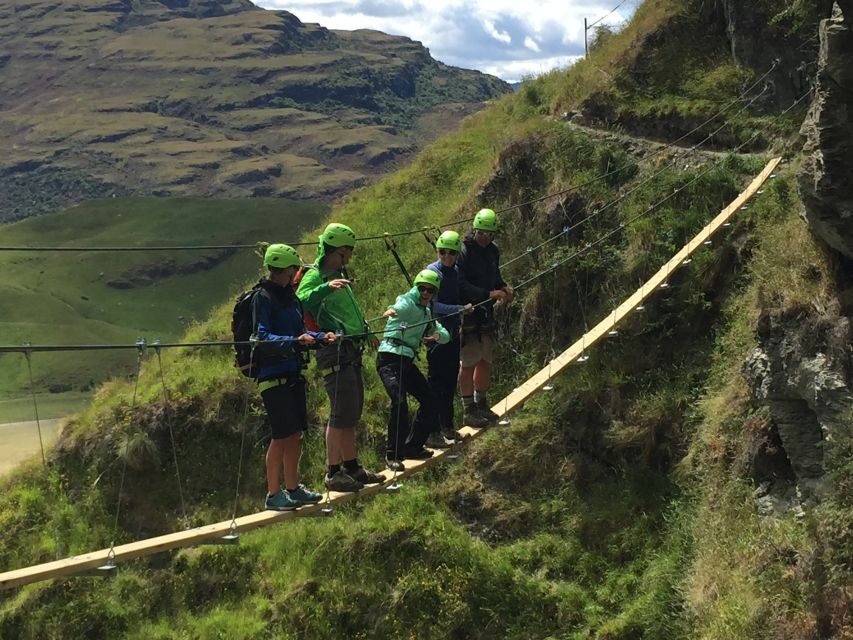
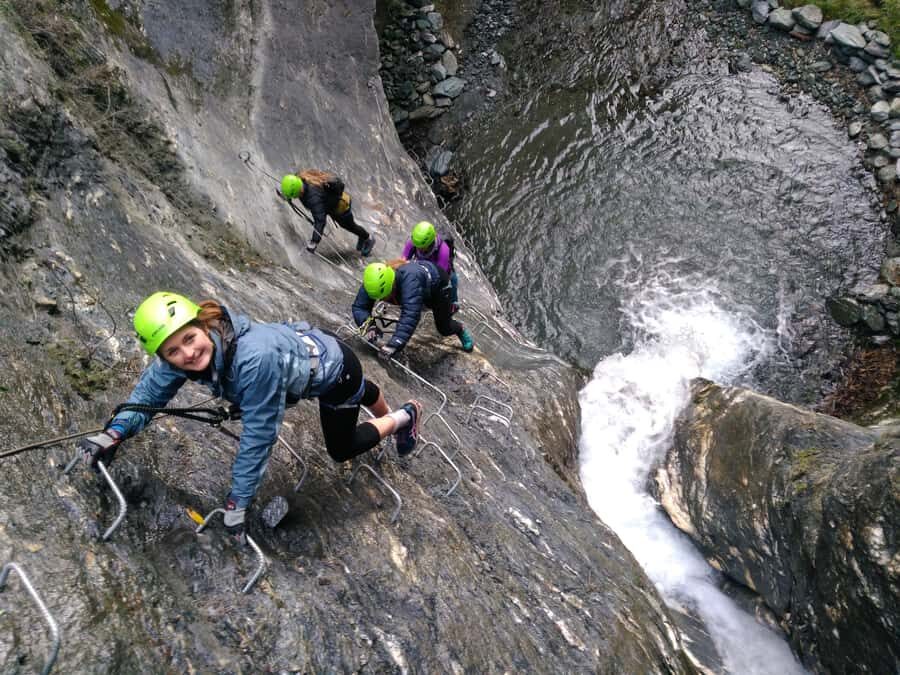
You’ll scale vertical and horizontal rock sections, then you’ll cross suspension bridges over pools. These bridges are where you’ll feel your inner caution kick in, even if the route is labeled beginner.
Here’s what makes it fun instead of scary: the route keeps you moving. You’re not just standing there thinking about the height. You’re stepping, clipping, transferring handholds, and following the guide’s timing.
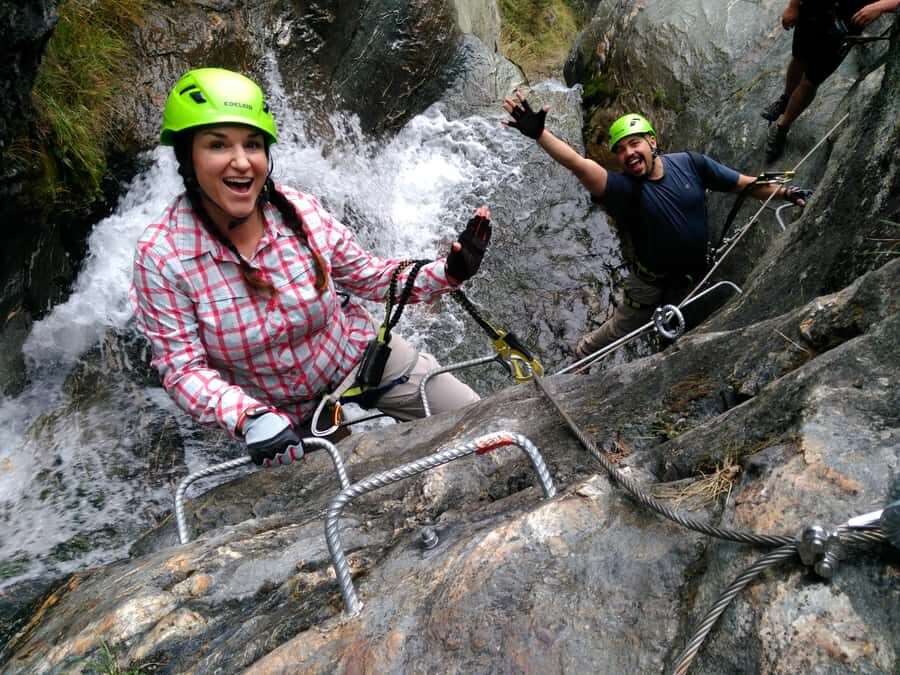
One more thing I’d highlight: the route includes hidden waterfalls and beautiful pools you can reach only because you’re climbing, not hiking. Up close, the waterfall energy changes the whole feel of the area. It’s wetter, louder, and somehow more intimate—like you’re inside the mountain’s plumbing.
The snack-and-view moment at the top
At the end of the climbing trail, you get a small break: snacks and water, then a chance to look out.
This is not a rushed photo stop. You’ll pause long enough to admire farmland, the mountain range backdrop, and Lake Wanaka. It’s also the moment where a lot of people realize they’ve done more than they thought they could.
If you feel like continuing, there’s often an option to upgrade. Some groups choose to go further after finishing Level 1, and you’ll see that in how people describe it: they start cautious, then they keep going because they still have energy and confidence.
Then the fun isn’t over—just switched. You’ll start a 15-minute descent back down to the base of the waterfall.
That descent matters more than people expect. It’s controlled, guided, and it gives your legs a chance to recover while still keeping the whole day coherent.
How hard is it, really? Fitness vs. fear
This is a “beginner” climb, but don’t confuse beginner with easy.
The experience is a combination of hiking, rock climbing, and walking, and you’ll need a moderate fitness level. You’ll also want full body mobility, because via ferrata movement asks for reach, balance, and quick stance changes. The good news: you don’t need prior climbing experience. Guides assist you with technique and equipment use.
Age and weight requirements are also clear:
- Minimum age/weight: 10 years and 40 kg (88 lbs)
- Minimum body size: 120 cm (3 ft 9 in)
- Upper weight limit: 120 kg (264 lbs)
If you’re wondering about older adults: some couples in their 60s did it and described it as manageable with normal walking fitness. If you walk regularly and can do steps without feeling wrecked, you’re likely within the right zone.
Now, fear is the other factor. The suspension bridges and exposed rock sections mean the route isn’t built for people who hate heights. That said, many first-timers—especially those who feel nervous at the start—report feeling safe because the guides keep you calm and supported. Coaching from guides like Tristan and Jasper, Chester and Rocky, or Sarah comes up repeatedly in people’s descriptions: calm instruction, patience, and a focus on making you feel in control.
So my practical advice is simple: if you can tolerate short moments of height and you’re willing to follow instructions closely, you’ll probably enjoy this a lot. If heights cause panic, you should think carefully before booking.
A few more Wanaka tours and experiences worth a look
Guides, group size, and why it feels safe
Safety here is not just a slogan. It’s built into the flow.
You’ll get:
- an equipment safety briefing
- helmets and harnesses provided
- expert guiding throughout
- small group sizes (no more than 5 people per guide)
That last part is underrated. With a small ratio, guides can watch foot placement, help with grip choices, and adjust your pace without leaving you hanging.
You’ll also notice how guides communicate. Multiple guide names come up in the feedback: Rocky, Chester, Tristan, Jasper, Connor, Liam, Nolan, Georgia, Jasmine, and Sarah. The pattern is consistent—people feel reassured and supported, especially during the tricky first sections. Even humor shows up in some descriptions, usually as a way to lower stress so your body can cooperate with the movement.
If you’re nervous, this matters. The experience is physical. Your mindset controls part of the difficulty. A calm guide helps your brain stop treating every rung like a cliff edge.
What to pack for a smooth, grippy day
You don’t need much, but you do need the right basics.
Bring:
- water (a water bottle is not included, so bring one if you like having your own)
- weather-appropriate clothing
- a daypack
- hiking shoes
Don’t wear:
- open-toed shoes
There’s also an area where you can leave items you don’t need at the base of the waterfall. That’s helpful because you’ll want both hands free during climbing and no loose stuff flapping around.
Camera note: you can bring a camera, but it’s at your own risk. If you have a GoPro, the advice is to attach it to your person or ask a guide if a helmet with a slide attachment is available.
My rule of thumb: dress for damp. Even if it’s not pouring, waterfall areas can feel wetter than the road outside.
Price and value: what NZ$118 buys you
The price is $118 per person for a total of about 3 hours. That breaks down into a training introduction, roughly an hour of climbing on the beginner route, a snack break, and a short descent.
At first glance, it’s not a bargain like a museum ticket. But in this case, you’re paying for:
- expert guiding (the equipment and the humans both matter)
- climbing safety gear plus safety briefing
- the practice climb that reduces stress
- snacks and water during the day
For a first-timer, that support is the value. You’re not just buying access to a viewpoint. You’re buying instruction, risk management, and a guided path to waterfall-adjacent terrain you can’t safely attempt alone.
If you finish Level 1 and want more, there’s often a chance to upgrade. That can improve value further if you’re physically comfortable and want a longer, more adventurous route.
So I’d think of it as paying for confidence plus a memorable, structured challenge—not a generic “activity.” For many people, that’s exactly what makes it one of the top things to do around Wanaka.
Who should book this Wanaka waterfall cable climb?
I’d point you toward this tour if you want:
- a beginner-friendly via ferrata experience with strong coaching
- waterfall scenery up close, including pools you can only reach by climbing
- a thrill level that’s real but guided
- a small-group adventure instead of a big crowd
It’s also a great choice if you’re the group member who says, I’m nervous, and everyone else still wants to try something bold. The setup is designed for that mix: practice first, then small group climbing, then support through the bridges and rock sections.
You should think twice if:
- you hate heights or panic on exposed suspension bridges
- you don’t have full body mobility
- you can’t meet the height/weight minimums
- you need accessibility accommodations that fall outside the route’s physical demands
Should you book the 2-Hour Beginner Waterfall Cable Climb?
Book it if you want a hands-on, step-by-step challenge in spectacular Twin Falls country, with small-group guidance and a practice phase that makes the whole thing feel doable. The best sign is that you’re curious but nervous. That’s exactly where this tour’s structure shines.
Skip it if heights reliably trigger panic, because suspension bridges are part of the beginner experience. Also don’t plan to wear the wrong shoes or show up under-fueled; bring proper hiking footwear and water.
If you’re on the fence, do this thinking: you’re not risking a DIY climb. You’re paying for gear, training, and a guide system built for beginners to succeed.
FAQ
How long does the waterfall cable climb take?
The total duration is about 3 hours, with an approximately 1.5-hour introduction and a beginner climbing segment of about 1 hour, plus a short descent.
Where is the meeting point near Wanaka?
Meet at the Wildfire gate at Twin Falls waterfall. You’ll see a locked farm gate with the activity provider’s sign in front of the waterfalls.
Do I need any climbing experience?
No. You don’t need prior climbing experience. Guides provide a safety briefing and a practice climb before you start the real beginner route.
What should I wear and bring?
Wear hiking shoes and weather-appropriate clothing. Bring water, a daypack, and avoid open-toed shoes. Water is provided, but a water bottle is not included.
Is it only for kids?
It’s not for very young children. The minimum age is 10 years, and there are also height and weight minimums.
What kind of difficulty should I expect?
It mixes hiking, rock climbing, and walking, so it’s best for people with moderate fitness and full body mobility. You’ll use rungs, pegs, ladders, and suspension bridges, so heights are part of the experience.